Making hard candy is a really fun activity to do with your friends and family. It’s also a good way to get them hooked on something that they may not be interested in!
However, cooking hard candy can be dangerous if you don’t know what you’re doing. Without the right techniques, your boiling sugar may end up grainy (which is an undesirable trait in hard candies).
That’s why today we are going to talk about some tips and tricks for hard candy making like a pro!
1. Use a candy thermometer
Even with the cold water test, which is a way to guess the sugar’s temperature without a thermometer, it is unreliable for getting a consistent product.
Trust me, if you are making small batches or use food coloring, eyeballing the hard crack stage of sugar cooking is very difficult! With small batches, the sugar can go over the hard crack stage in a matter of seconds.
Using a candy thermometer is the only way to ensure proper hard candy consistency.
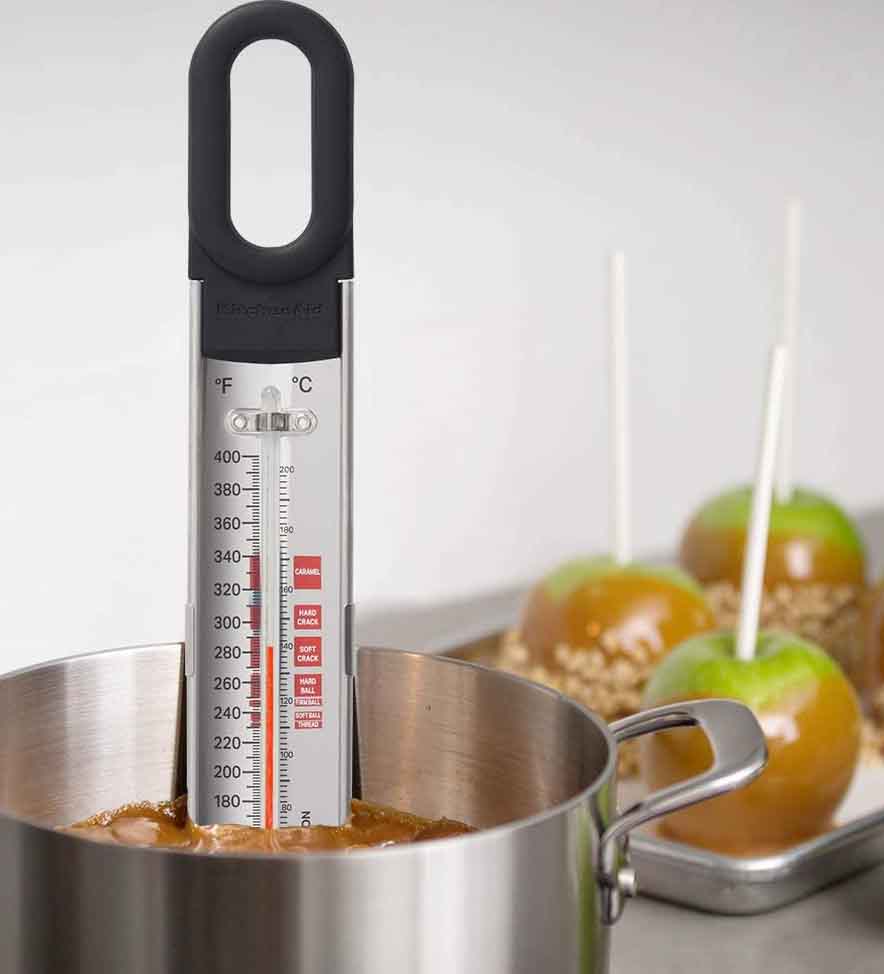
A candy thermometer makes it easy for you to see when the sugar has reached the hard crack stage. Making hard candy without one can be difficult, especially for a beginner.
Make sure the thermometer has a clip/clamp like this one in order to prevent the thermometer from falling into the boiling sugar.
What is really convenient about this thermometer is the labeling of different stages of cooking sugar.
To test your candy thermometer, boil some water and place the thermometer in. It should register around 212 degrees. If you are a little under or over, take that difference into consideration when making your candy.
Tip: Don’t worry too much about burning your candy (unless there is added milk, cream, butter, etc.). Sugar and water are impossible to burn until all the moisture has evaporated which is well over 350 degrees Fahrenheit. You won’t be cooking candy at this high of a temperature.
If the thermometer shows a reading a few degrees over the desired temperature, toss in a little bit of water. Then watch carefully for the right degree. While you probably won’t burn the sugar going a little hotter than a recipe calls, going over too much will result in your sugar cooking
The best candy thermometers are probe-styled as they are the most accurate and easiest to read. Some also include a clip that allows you to attach the probe to the side of your pot.
2. Cook candy on a dry day
Yup, humidity can play an important factor in how your candies turn out after it has cooled. If you cook candy on a humid day, the humidity will have an effect on how hard your candies are.
To combat this issue, try cooking it during a dry day or use a dehumidifier in the kitchen.
Ideally, the best day to cook candy is during cool and dry weather.
It’s important for candy recipes to be followed correctly so that you can get hard candies instead of slimy, melting candies.
3. Wash undissolved sugar on sides of the kettle
It is important to get the grains of undissolved sugar off of the side of your kettle to reduce graininess and uneven heating in the final product.
You could splash syrup on the sides (while stirring) to wash down the grains with whatever utensil you use to stir.
After that, cover the pot/pan and allow the steam to break down any overlooked sugar grains. Do not steam your candy if you’re using butter, cream, or milk!
4. Don’t make more candy than you can cool quickly
Cooling quickly is important after cooking candy otherwise the end product will end up grainy. So, it is best to make hard candy in small batches. Fast cooling = less sugar recrystalization
With every batch, you will need to cool the sugar quickly before pouring it out onto a greased surface or parchment paper.
While using a spatula to get the rest of the candy out of the pot, do not lick the candy! It can be tempting but remember the candy has been cooking in temperatures way over the boiling point of water.
However, don’t lag around too much waiting for candy to cool.
I highly recommend using a pizza cutter to cut squares of hard candy while the candy is still cooling down and not fully hardened.
5. Coat with powdered sugar to prevent sticking
Whether you break up your candy manually or use candy molds, it will sometimes stick together, especially in humid or hot weather.
The sweetest way to combat this is to do a light coating of your hard candies with powdered sugar.
One method to coat your candies is to put them in a container with a lid, add powdered sugar, then give a thorough shake.
This also prevents hard candy from sticking to the container itself.